The Completed Shelving Project
The crappy shelves we had from our respective college years were beginning to be annoying. We decided to look into purchasing shelving. Quality shelves are expensive. We went to several stores and were unimpressed with what we were seeing. Here is what my research indicated:
- Professionally built-in book shelves from floor to ceiling would have been about $10,000+.
- Paying a professional to make shelves like I made would be around $3,000 – $5,000.
- Buying nicer quality shelves from stores would have been about $300 per shelf on the low end.
I will note many of the shelves we looked at in number 3 above were also terrible quality shelves. Therefore, we figured if I could make quality shelves for less than $300 we’d save money and I’d learn a skill.
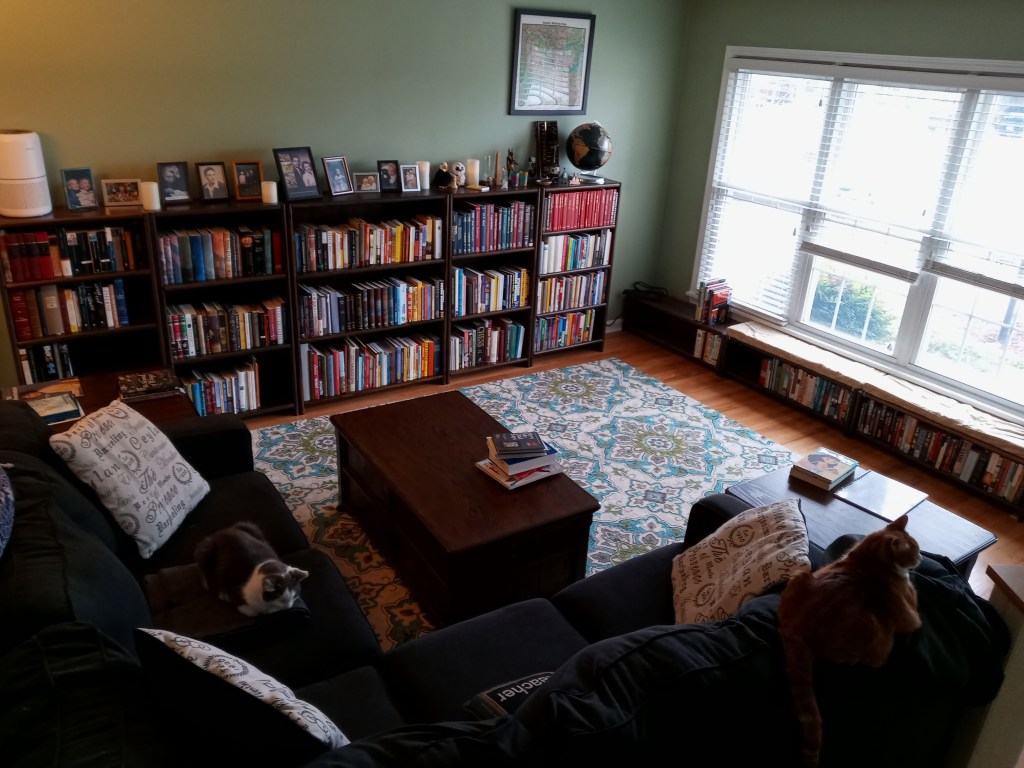
The image above has the following information pertaining to this article:
- 8 individual shelving-units
- 20 individual shelves on which to store books
- 4 different shelf designs
Under the windows are the second shelves I designed. Essentially, they are low to the floor, fit smaller books, and Tracy made foam pads with an outer layer of cloth bearing a brown-scale world map pattern. This is often where the cats sit, especially when the weather is nicer and the windows are open.
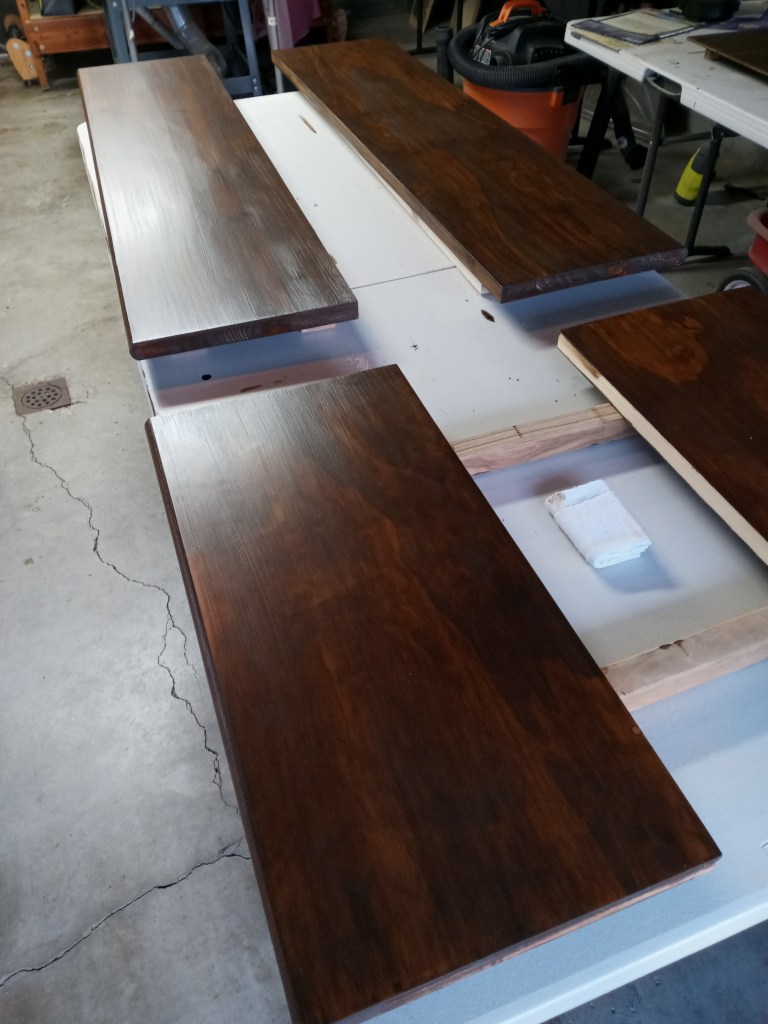
On the wall with the taller shelves there are 3 additional types of shelves. The central shelf is the widest shelf at 38″ across. This was the first shelf I made and came with a lot of errors. The main concern with this shelf is if we put heavy books on it then it could bow overtime. Therefore, despite the size of some of the books, they are all quite light. The bottom shelf is reinforced underneath with a wooden beam and, therefore, can hold a heavier load.
The shelves directly adjacent, on both sides, to the central shelf are narrower versions of the center shelf. Essentially, I used the same design and made them shorter so they would be far less likely to bow over time. Here is a closer look:
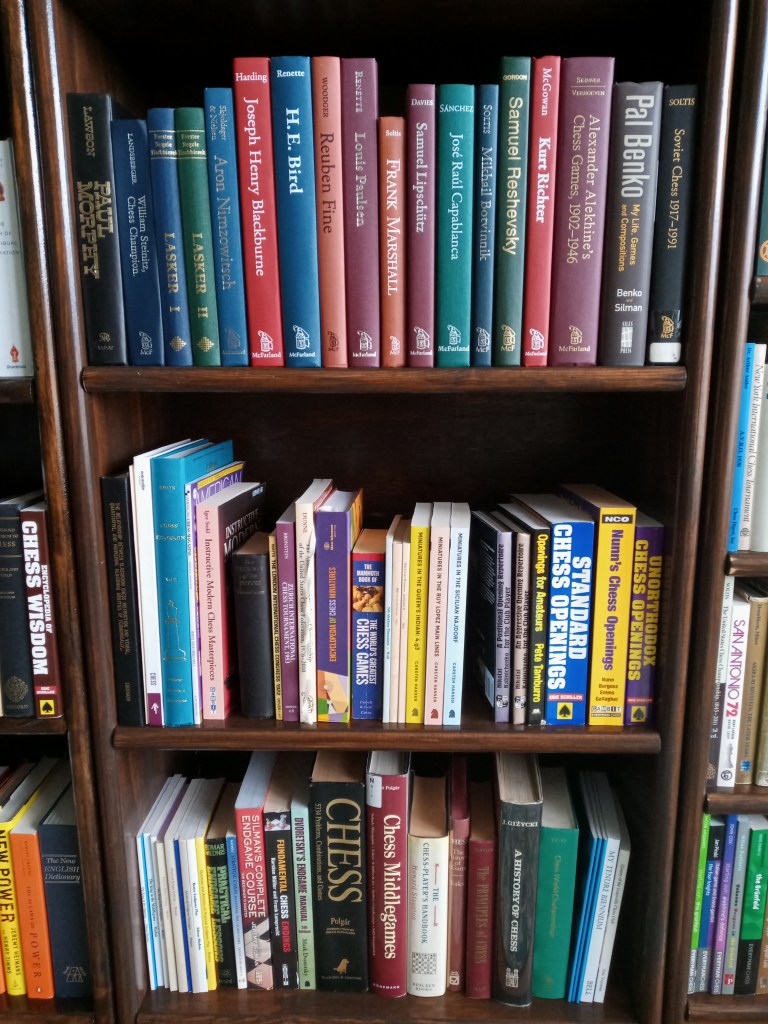
Before making these shelves, I measured our tallest books to ensure even our “coffee table books” had a place on the shelf. The tallest book on this shelf is Chess Middlegames. This shelf was designed to be able to fit this book. The shelf to the left of it, which is the central larger shelf, was 1 inch taller because a book entitled The Dawn of Civilization, a large coffee table book, sits on it.

This shelf features more chess books. The end shelves in the first picture of this article are both like the one in this image. They each include an additional shelf to store books but, of course, they are shorter. The two tallest books on this shelf are Reassess Your Chess, 4th Edition and The Sorcerer’s Apprentice. This shelf was made with those two books in mind.
Shelving Project Costs
Before diving into the shelf making process, I will show the cost of these shelves. Here is everything I needed to make the shelves:
- $290 – Stair Planks
- $60 – Plywood
- $300 – Pre-Stain, Stain, & Polyurethane
- ~$3 – Finishing Nails & Screws per shelf
- ~$10 – Sand Paper
In total, it was about $650. If you count the 3 window shelves as “one shelf” then each shelf cost an average of $108 which is $192 below budget per shelf.
Therefore, depending on how you want to measure it, we saved about $900 to $2500 on shelves. I figure if you count the shelves under the window as “one” shelf we’d have spent around $900 finding shelves or around $2500 extra on having someone make them for us.
Shelving Costs Explained
The most expensive shelf was the widest shelf for 2 reasons:
- it required the most materials and
- it was my first shelf so there was a lot of learning going on.
This shelf, and the 3 shelves beneath the windows each used oil-based stain which is about 3 times cheaper than water-based stain. The other shelves were all made with water-based stain.
As you may have guessed based on my pricing list, I made the shelves out of stair planks. I got this idea from a youtube video by This Old House. However, I did not follow their instructions precisely because our needs are different. For example, I did not do any rabbit cuts to inset the back panel into the wood since we’ll never see the back and I used stain instead of paint.
The plywood costs were not too bad. The back panel on each shelf is plywood. Each shelf of course required nails and screws so my cost there is an estimate. Finally, the sand paper costs were minimal since I had already purchased sandpaper for a previous project. The sand paper I used were sanding pads that attach to my orbital sander. However, I also used hand-sanding on some parts, too.
Environmental and Health Concerns
There were 2 major reasons I switched from oil-based stain to water-based stain:
- The drying and curing process of oil-based stain in KY humidity took about 8 months for the first shelf to complete.
- The fumes (VOCs – Volatile Organic Compounds) that come off the shelf during the drying and curing process are dangerous.
When staining, you have to pay attention to the level of humidity in your area. Being near the Ohio River in Kentucky, it is quite humid during the summer. It is humid during the rest of the year, too, but less perceptible because of colder temperatures. However, stain does not like being applied when it is cold, either.
There is also debate about VOCs not being good for the environment. Some people say they are insignificant as greenhouse gases but when you inhale this stuff it is horrible. So, I think it is likely not good for the environment – how could it be? Water-based stains dry much faster, cure faster, smell like cucumbers (oddly), and have extremely low VOCs. The dry and cure time for water-based stain in KY’s humidity is about 2 weeks (and not 8 months). So, there is no competition as far as I am concerned.
Creating the Shelves
Obviously, to make shelves and do any sort of woodworking, you will need some tools. I have very few tools compared to most woodworkers. But, here are the tools I needed and used:
- Table Saw (Optional, but very useful)
- Back Saw
- Rip Cut Saw (ie: “Hand Saw”)
- Tape Measurer / Metal yard stick
- Hand Sander / Sanding Block
- Paint Brush
- Lent-free cloth rags
- Power Drill
- Hammer
- Finishing Nails & Screws
- Corner Clamps
Saws
Because hospitals were overrun with anti-vaxxers, I decided not to use my table saw for the last 3 shelves I made. Why? Because I am still new to it and using hand saws are far less likely to harm myself. It would be unfortunate to damage myself and not be allowed into the hospital because an idiot anti-vaxxer doesn’t want to get a shot (yea, I have no sympathy for these people at this point). So, the table saw makes things go much faster. However, you can do this with hand saws, too.
Rather than describe how to use the saws, I recommend watching a lot of YouTube videos. Personally, I watch about a dozen safety videos for each tool I have before using it.
Measuring
I found a measuring tape to be equally useful as a metal yard stick. I also have a 4-foot metal “yard” stick. I am not sure what to call it if it is 4 feet long instead of 3 feet long. But, that was useful because the shelves measure 4-feet in height.
Sanding
A power sander is a very nice luxury when woodworking. Specifically, I have a Black and Decker hand sander – very simple to use. I did a little bit of hand sanding on the curvy part of the shelf. Otherwise, I mostly used the hand sander.
Print Brushes & Lint-Free Cloth Rags
I used crappy $1.00 paint brushes for this project. They worked fine and I got a lot of uses out of them because I always cleaned them well. A nicer brush may have been better to use. But, for a first real wood working project, I didn’t want to go overboard with it.
The Lint-Free rags were important at several stages. Essentially, if you have rags that produce lint, then those bits of lint can stick to the stain or get inside the polyurethane coat and look bad. So, these were pretty important.
Power Drill, Hammer, Nails, and Screws
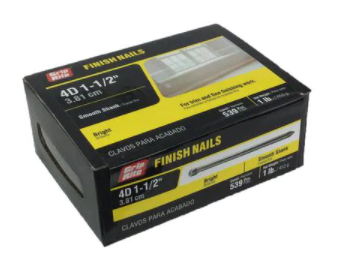
Most people who do woodworking will have these things. As per the advice in the referenced This Old House video, I used Finishing Nails for the back panel and Trim Head Screws to hold the shelf together. Trim Head Screws are long screws that will provide a lot of support.
Corner Clamps (HIGHLY RECOMMENDED)
If you wish to make several shelves, I highly recommend buying corner clamps unless you have someone who can help you. Without help, assembling the shelf is quite difficult if you do not have a way to hold 2 pieces of wood together. They are easy to use and I strongly recommend buying 5: 4 to hold the shelf sides, top, and bottom together and an additional one to place on top while screwing things in (it helps keep it aligned more).
Shelf Building Process
Here are the steps in order with explanations to follow:
Step 1 – Buy all materials before beginning the shelf.
Step 2 – Cut the boards to the proper length.
Step 3 – Raise the grain and sand the shelf.
Step 4 – Vacuum all the sawdust.
Step 5 – Apply Pre-stain
Step 6 – Apply Stain (Remove excess stain)
Step 7 – Wait for stain to dry
Step 8 – Add polyurethane (first coat).
Step 9 – Sand between poly coats.
Step 10 – Vacuum sanding dust.
Step 11 – Apply a second coat of polyurethane.
Step 12 – Assembly.
Step 13 – Sit outside for drying / curing.
Step 1
Buy all materials needed for the shelf in advance of starting the shelf. Otherwise, you will delay your work.

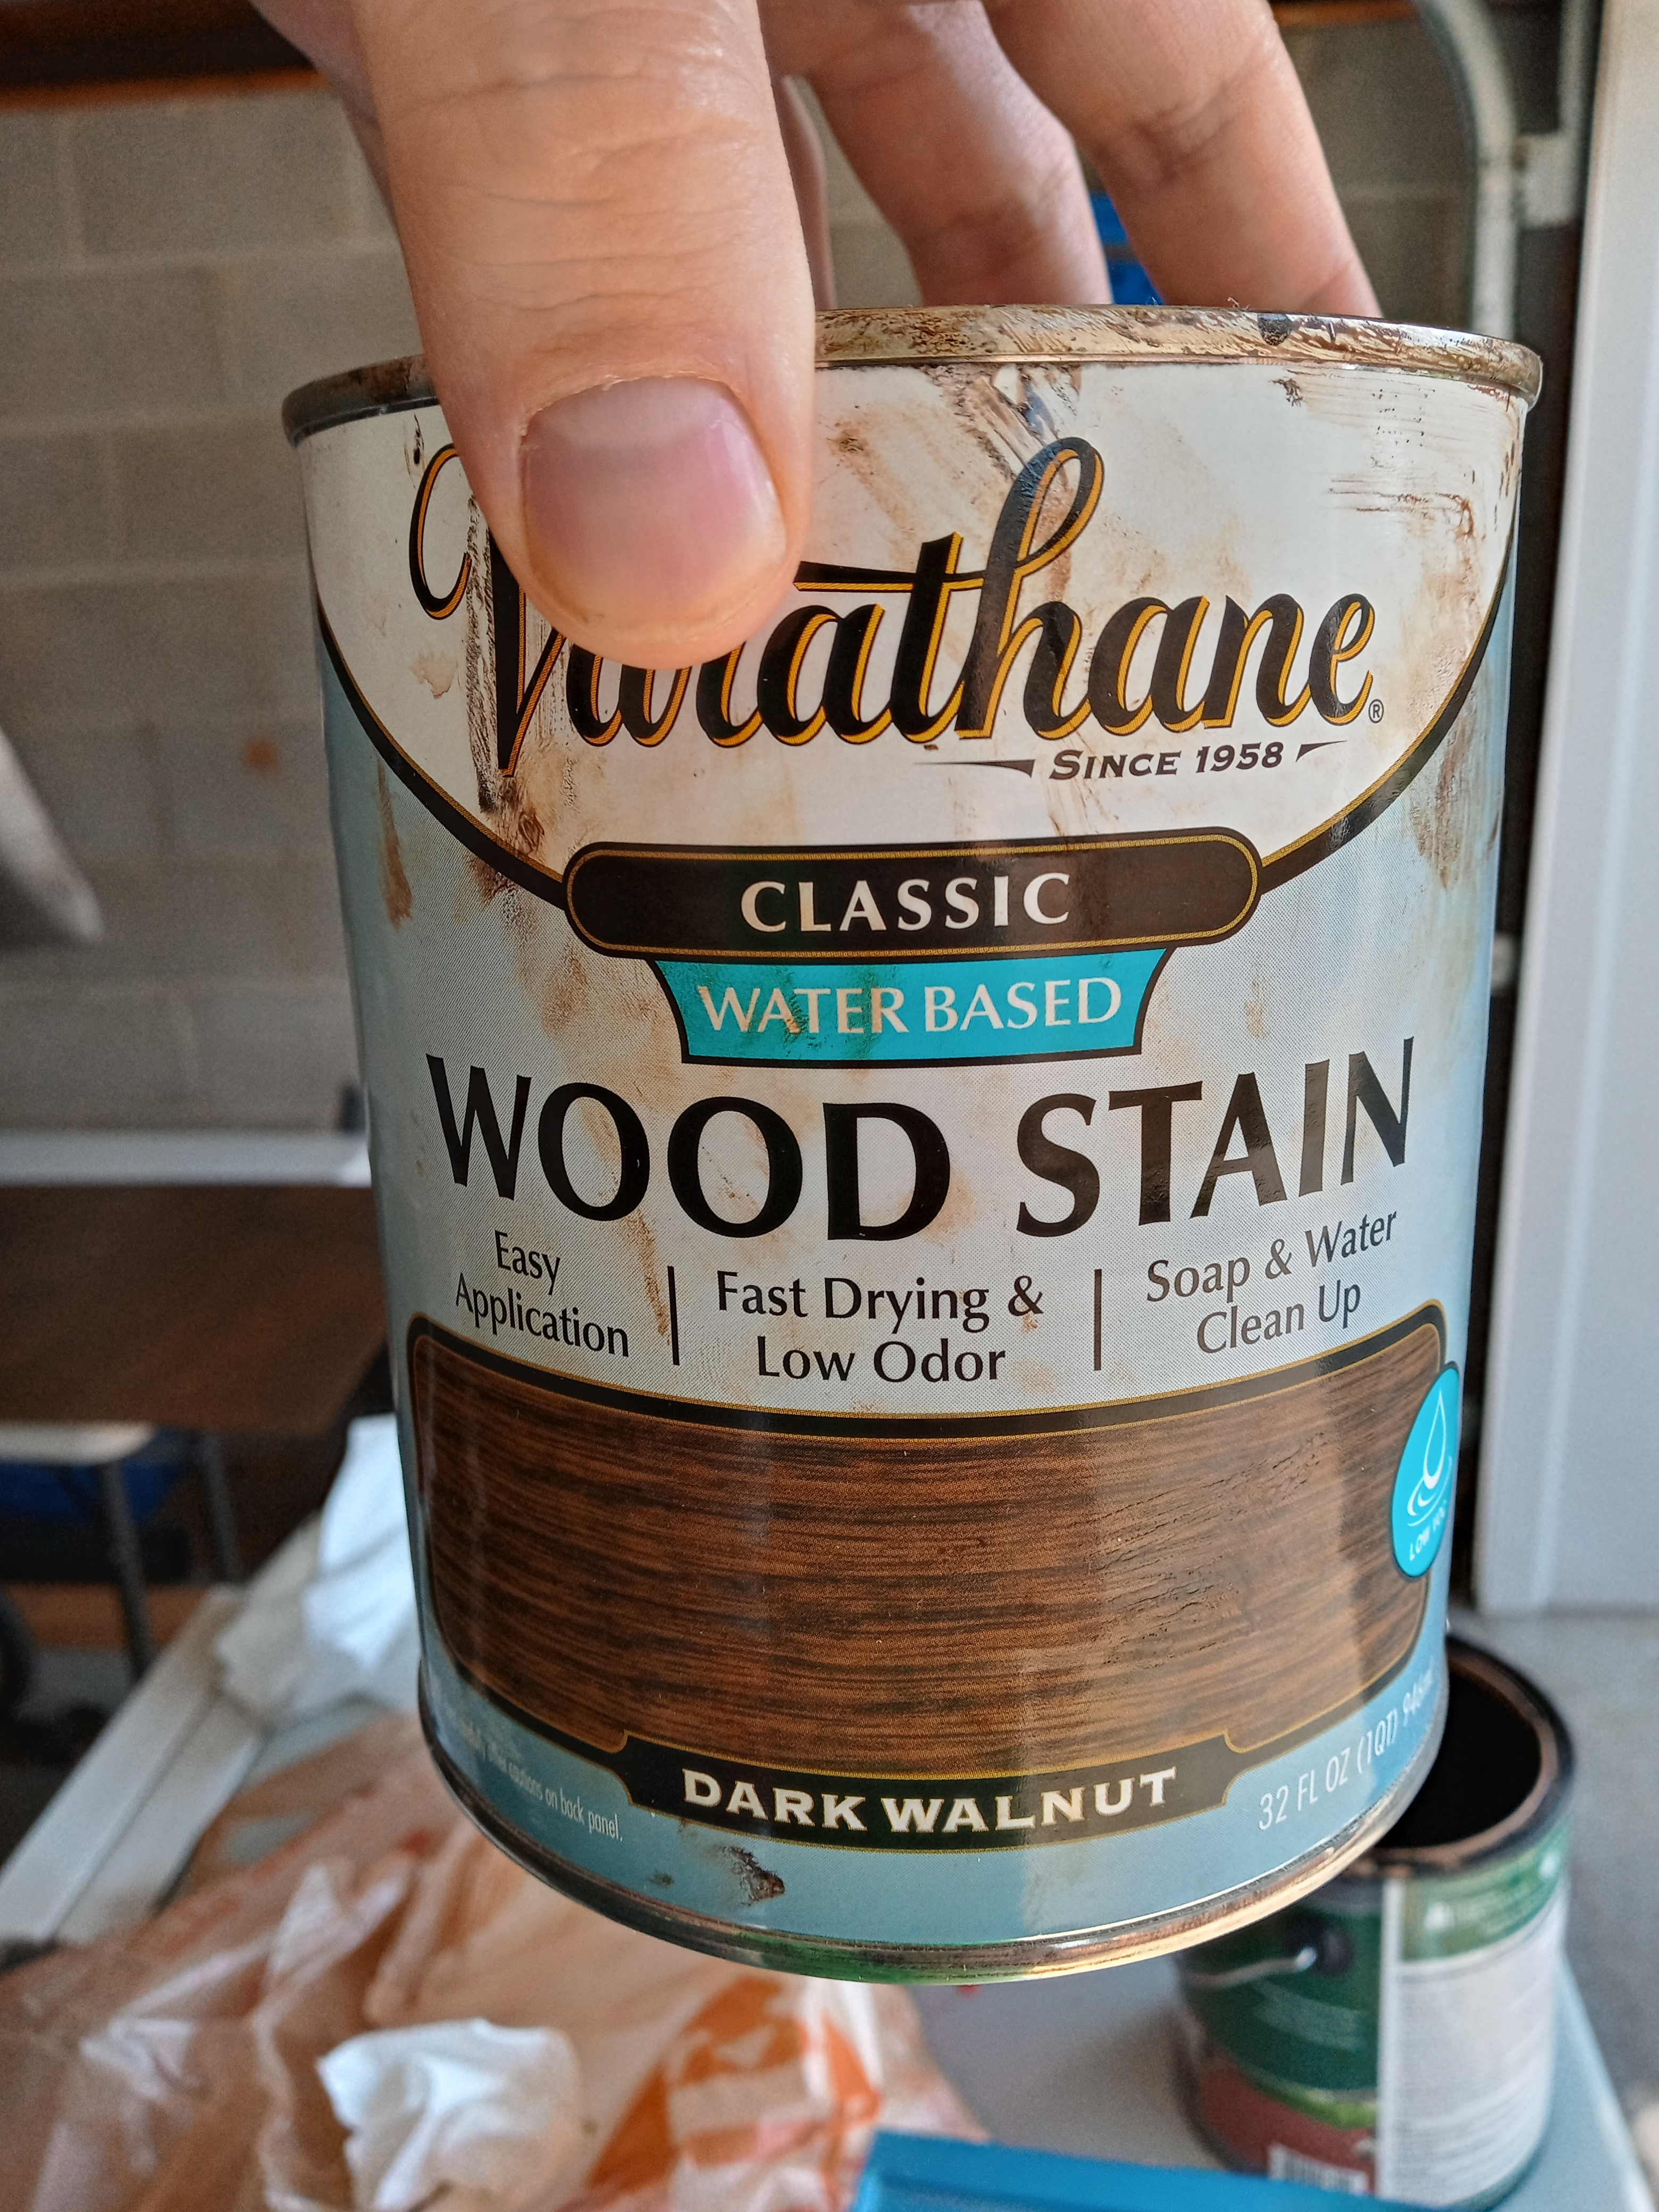

Note that when buying pre-stain, stain, or polyurethane that often there are dents in the side. While a little annoying, this is fine as long as the seal isn’t broken or the side punctured.


Sometimes you can fine a multi-pack of sandpaper discs. This is convenient because they will give you ascending grits to work with. However, I bought a 10 pack of each level and have been using them all for various projects.
If you are inexperienced like me, I will also note that packs of screws usually come with the drill bit that is needed. I didn’t know this because, well, I’m new 😛

Sometimes when buying stair treads there will be dents in the stair treads from the shipping process. Light dents as fine but larger ones aren’t (unless you plan to cut off that part of the tread). So, inspect the wood before buying it. Many stair treads have a very thin veneer placed on them. Therefore, a larger dent will become harder to repair the surface look.
Step 2
Cut the boards to the size you want. My shelves were 4 feet tall and about 1 foot deep (and the shelves varied in height-per-shelf based on my tallest books). I will note that when I began learning how to cut wood that it did not occur to me that different saws are designed for different tasks. So, that was another newbie level thing I learned.
Essentially, the type of saw used will large be determined by whether you are cutting with or against the grain. In my case, I was cutting against the grain (ie: cross cutting) so I needed to use a backsaw since that is what it is designed to do.
Step 3
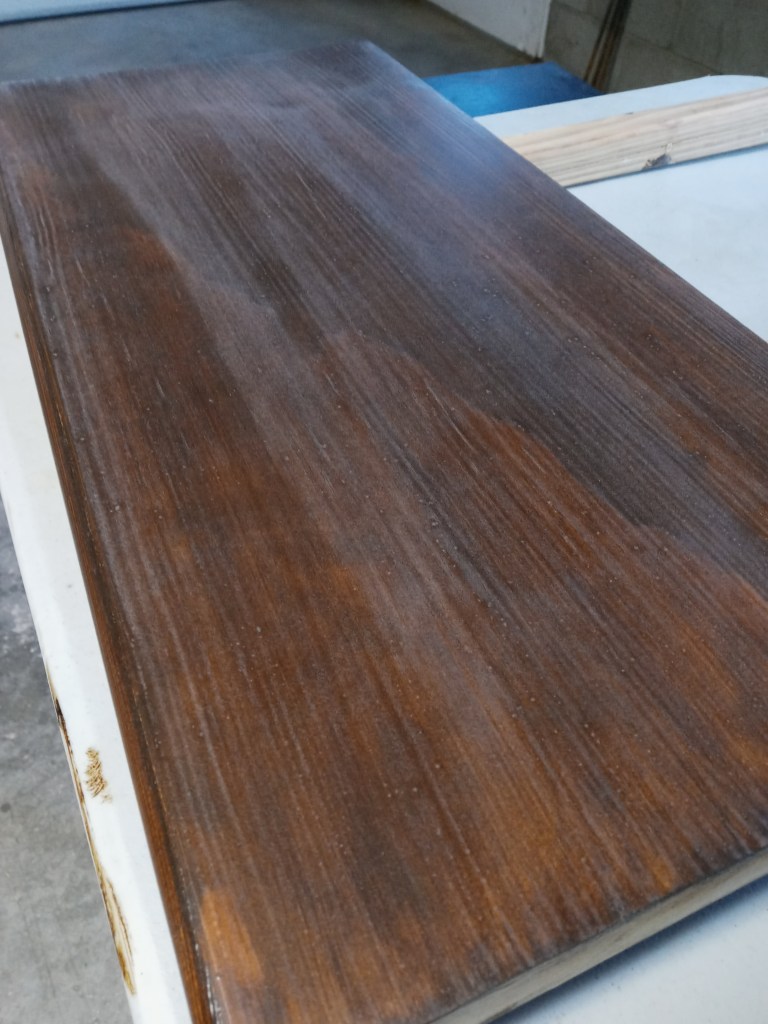
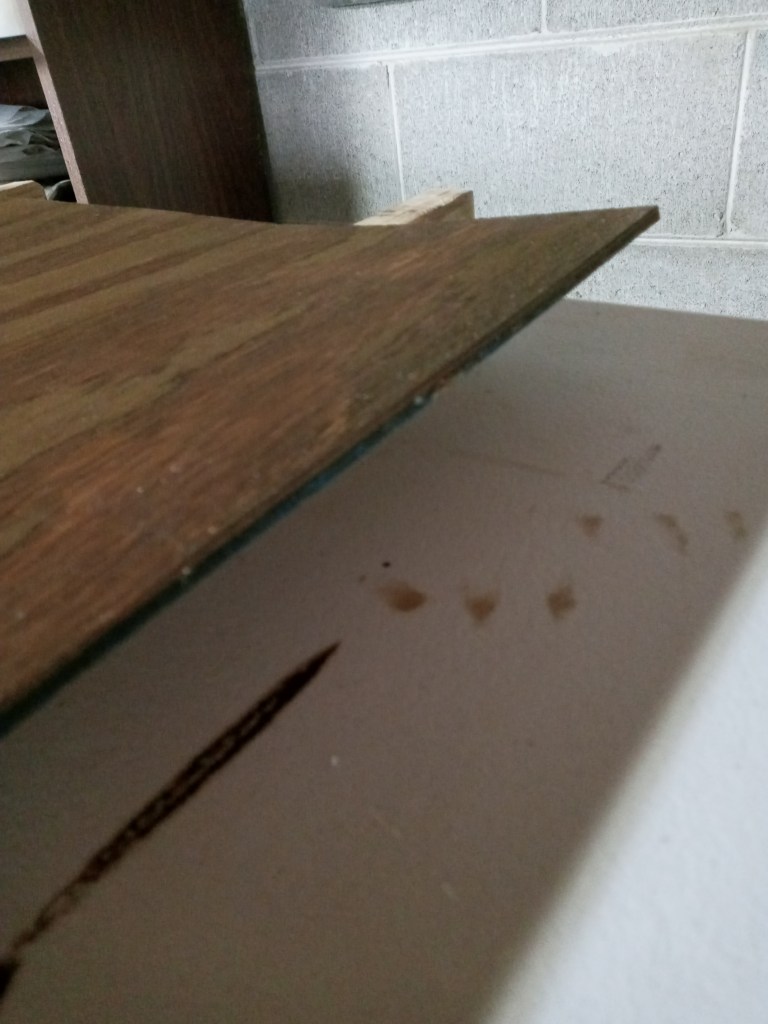
Raise the grain and sand all sides of each piece of wood, except the back panel, 5 times each using the following sand grit amounts: 80 (very coarse), 100, 120, 220, and 320 (extremely fine). This takes a little time to do but it is worth it. Let me show you why. Here is a close up of an image that shows you want “Raised Grain” looks like on a recently wetted piece of wood:
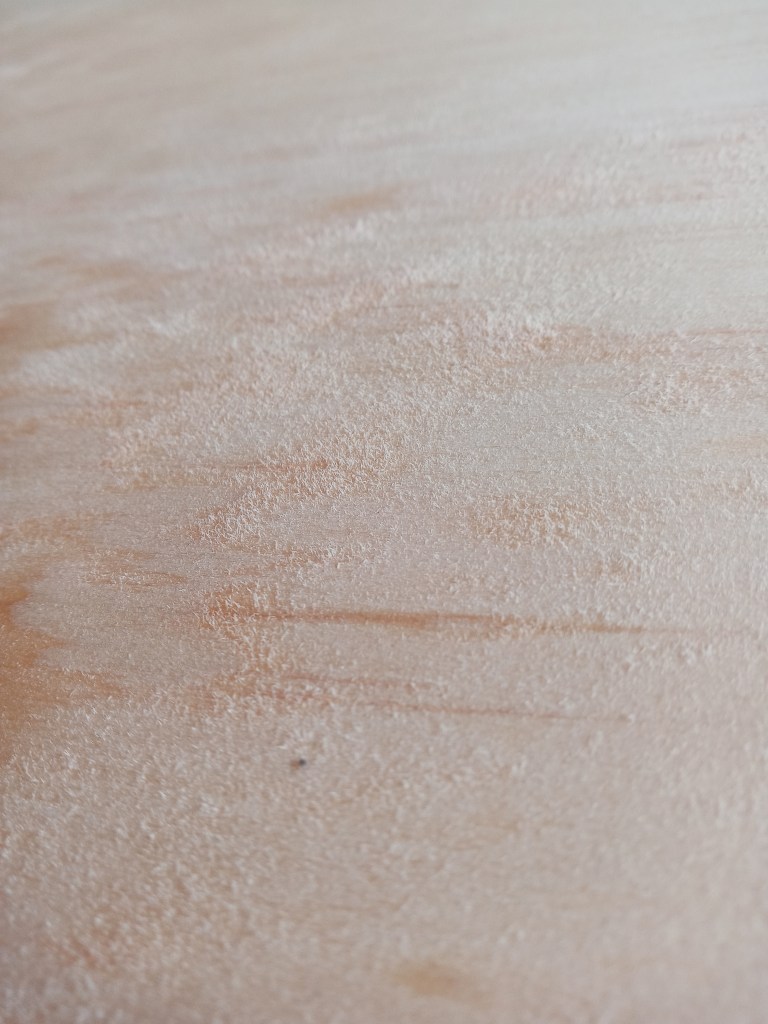
Do you see the “fuzzy” look? That is raised grain. Basically, before sanding, it is a good idea to raise the grain by putting water on the piece of wood you are working with. As the wood absorbs the water, the top layer of grain will essentially stand up. If you do not raise the grain before applying stain, then it can create rough patches when the stain dries. This occurs because the gain gets raised by absorbing stain. As the stain dries, it hardens a bit and the raised grain will become a rough patch.
Here is what I do to raise the grain. I simply get a small bucket with a paint brush and apply water to the board. I do it this way so I evenly apply the water which allows it to dry evenly so I can start the next step confidently:
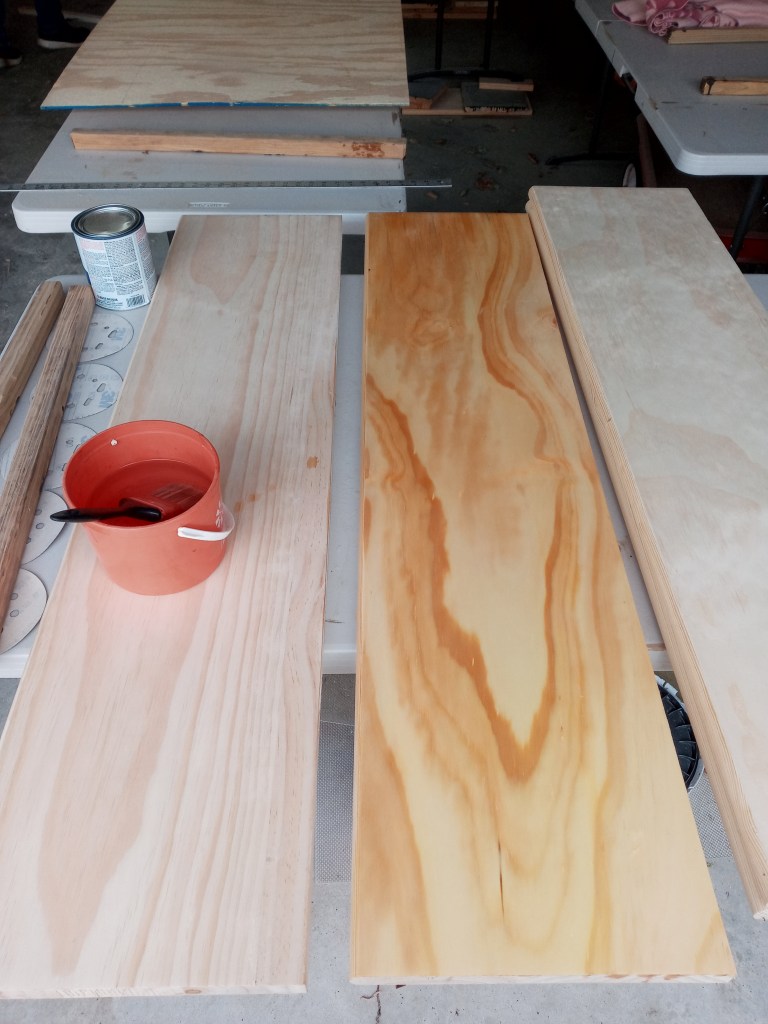
As you can see, the visual difference is pretty easy to see. As the board dries it will begin to appear more like the board on the left again.
Step 4
Vacuum every bit of sawdust you can. Vacuum the wood, around the wood, and anywhere else including the floor. I recommend vacuuming an hour or two after sanding (or even the next day). That way all the particles in the air have time to fall. Applying pre-stain and stain too quickly after sanding can result in sawdust landing on the stain as it dries. This can make the stain dry unevenly or produce bumps in the stain itself.
Step 5
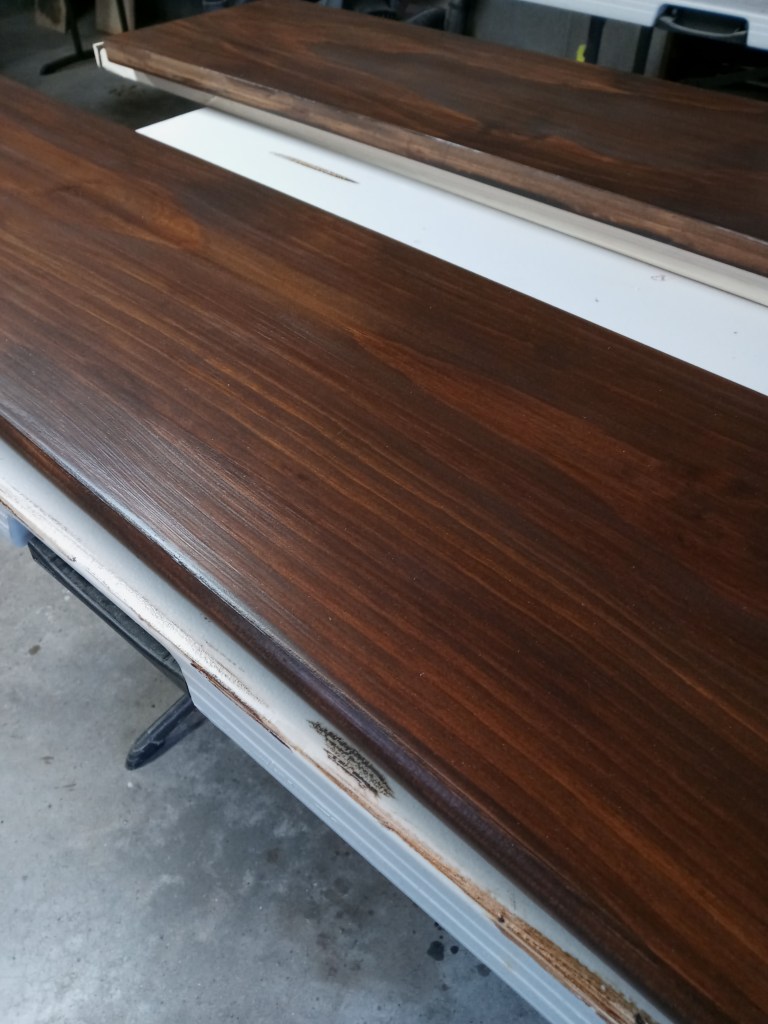
Apply pre-stain on one side of the board (unless you have the ability to suspend the board). Apply it based on the label’s instructions. Here is what the pre-stain looks like while wet vs. dry:

The pre-stained boards will look a lot like when you applied the water as pre-stain is quite clear like water.
Step 6
Apply stain according to the label to as many boards as you are comfortable doing. For me, I did all of the boards for 1 shelf at a time.
If you skip step 5, your stain will appear splotchy and not look very even. If you complete step 5 but apply the stain too quickly, you will still get a splotchy look. If you wait for the pre-stain to completely dry, you will get a splotchy look.
The key is to apply stain when the pre-stain is absorbed into the board but slightly damp to the touch. This took a little practice. Note that when assembling the project, you determine which way the boards face. If you have splotchy boards, you can face those downwards and no one will ever notice.
The water-based stain I used says to apply it with a lint-free cloth instead of a brush. The oil-based stain I used said to use a brush. So, read your labels. When applying, with a cloth, I recommend rubbing the stain on in circles to cover the whole surface first. Once covered, go back over with a folded cloth end to end lengthwise.
The reason I recommend circles at first is so you can quickly cover the whole board. I also found that when moving stain in circles, it drips down the side less. If you start out moving end to end, you will have stain drip down the sides which can cause a mess.

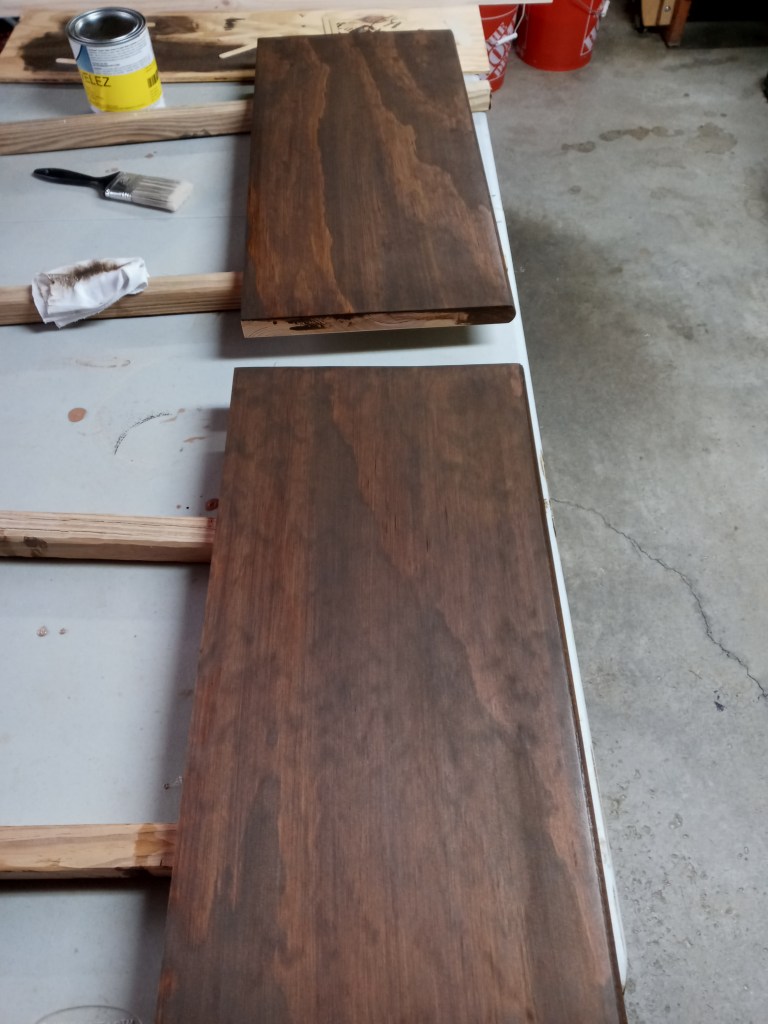
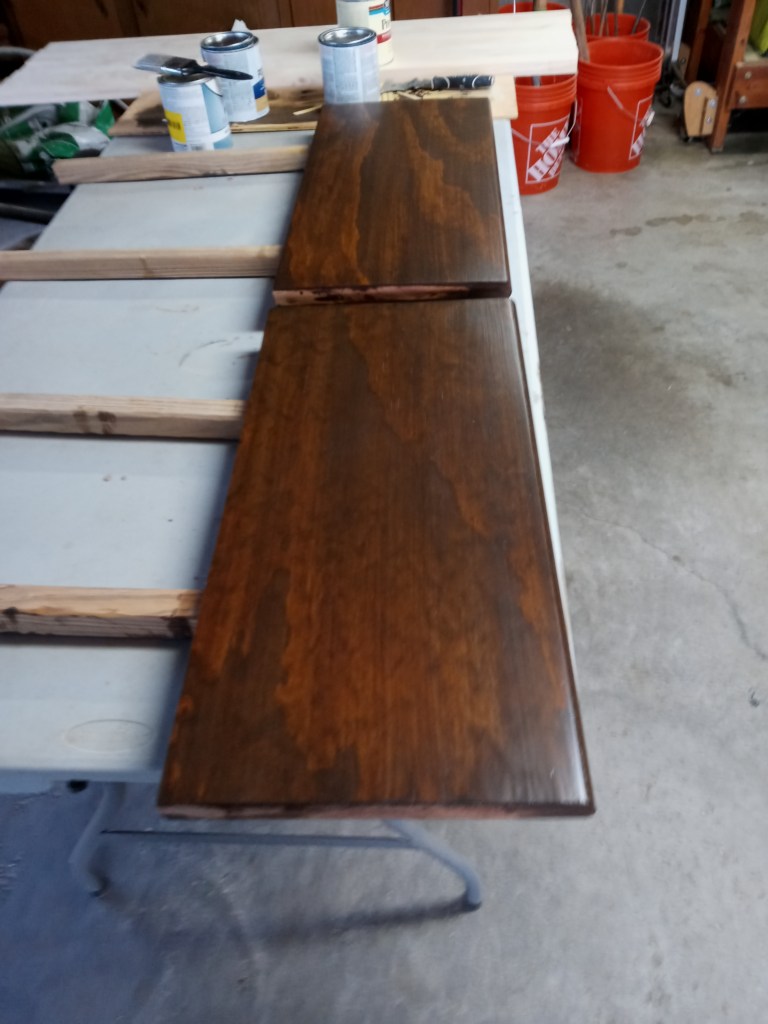
As you can see, I placed the boards I was staining up on some long pieces of scrap wood. That way if there is too much stain that drips down the sides, it will drip off instead of bleeding underneath the down-facing side of the board (which creates splotches along the edge). These issues are easier to control when you begin with circles because it spreads the stain out more. Excess stain is what causes drips, so keep this approach in mind.
Remove excess stain before allowing it to dry. If you do not, it will become very sticky and will create dark spots where the stain was not removed. This is a job for the lint-free cloths.
Step 7
This is the part that requires patience. Before flipping the board to stain the other side, wait a day or two minimum. Flipping the board before the stain dries can make it dry slower since that side has less open air when flipped. In KY’s humidity, I would usually wait 1 full day on less humid days and 2 days in higher humidity.
Once dry, flip the boards and then stain the other side.
Step 8
Once all sides of the shelf are stained, you can begin adding the first polyurethane coat. You will need to do a minimum of 2 or 3 coats if you use the triple thick polyurethane or a minimum of 3 to 5 coats if you are using a normal polyurethane formula.

In the picture above you see 3 key things:
- A lint-free cloth
- Polyurethane drips that need to be stopped before the drip to the edge
- Wet polyurethane on the board (the water-based kind looks like a very light purple milky color)
How did the polyurethane drip like this? Well, it is kind of inevitable based on how I did it. Check out the location and posture of the brushes in these next images:
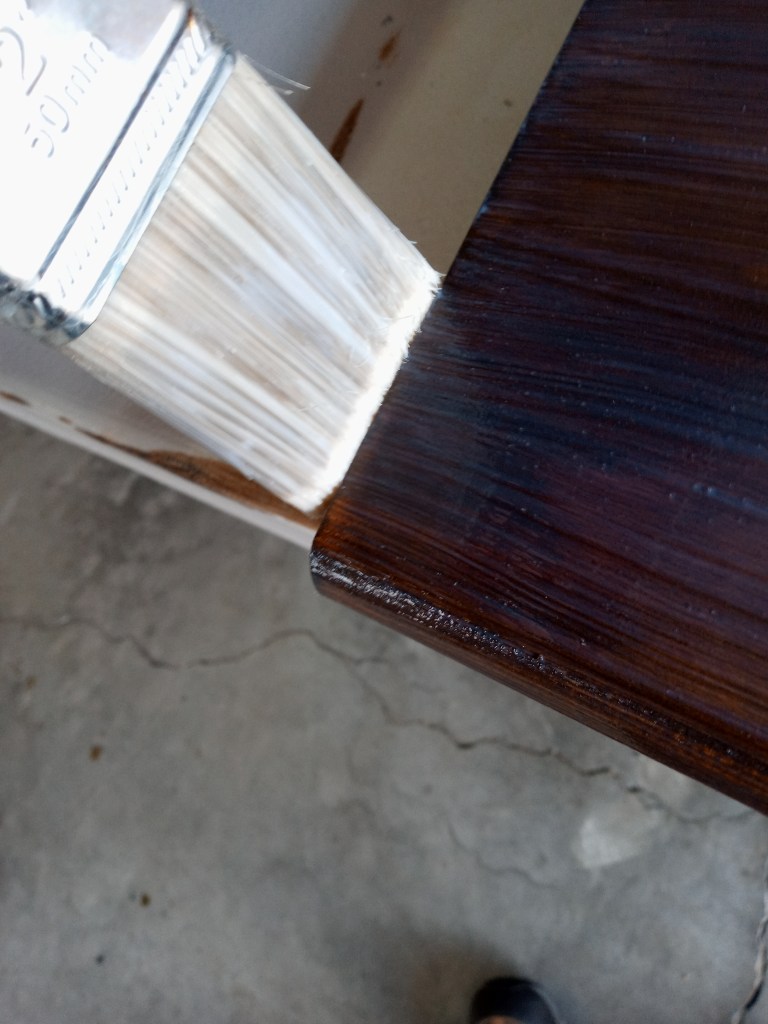

The first images shows the white-tipped bristles are even with the edge of the board. When drawing the brush against the wood at a 45 degree angle, if the bristles begin in this starting position, there will be no drips like in the previous picture. However, if the brush begins in the position on the right, then excess poly will squeegee off the brush and begin running down the side as in the previous image. So, be careful.
The triple thick polyurethane formula I used guarantees you only need to do 1 coat. Well… even though I am an amateur woodworker, I would go so far as to suggest that such a guarantee is absurd. It does require less coats because it is so thick. But, there are enough bumps and air bubbles that you will need to sand at least once (see next step).

Wait another day or so when allowing the poly coat to dry before doing the reverse side. Otherwise, when you flip the board, the weight of the board can create white streaks where it depresses the sorta-dry poly coat and it won’t look good. You will know when you can flip it when the poly coat feels dry and not cool-to-the-touch.
There are a lot of techniques you can learn on YouTube about applying polyurethane. The big enemies of putting on a poly coat in my experience are
- Saw dust
- Lint
- Animal hair (if you have cat or dog hair on your clothing for example)
- Paint brush bristles
- Bugs
- Air Bubbles
Saw dust is taken care of by vacuuming several hours after sanding / wood cutting. Lint-free cloths control the lint issue. Clean work clothes can prevent animal hair from getting onto your project. Using nicer-than-I-did brushes can help prevent bristles from falling out into the polyurethane. Bugs mostly don’t stick to the poly even when they land on it. However, sometimes they still can. An enclosed space, with proper ventilation, can help lower this issue.
However, Air Bubbles remain the biggest issue. Every air bubble that gets trapped in the poly turns into a bump when the poly cures. Therefore, this is where all the YouTube videos come in handy. There are many techniques to lower the number of air bubbles you produce. Here are some images of the completed polyurethane stage:
Step 9
Sanding between poly coats is important. I used 320 grit sandpaper for this project and that worked great.
Initially, I did not understand why this was but now I do. One of the reasons I liked using the triple thick polyurethane was because it gives me a very nice thick base layer. If I use a thin layer of poly and then try to sand it, I could damage the stained surface. However, I never damaged any surfaces with the triple thick stuff – this, to me, was the true value of the triple thick poly. Here is a picture of what it looks like when you sand a poly coat. I panicked the first time I did this as no one online showed this to me.
You see the milky white color and the little white dots? The white color are basically tiny scratches made by the 320 grit sandpaper and the dots were air bubbles. This looks absolutely terrible and, for me, was panic inducing that I just screwed everything up. But, no, the next coat of poly will fill in the tiny scratches and will dry clearly again showing only the wood.
Step 10
Vacuum after sanding the poly coat. This will require far less vacuuming than earlier when vacuuming saw dust. Just go over the boards and the immediate area.
Step 11
Apply a second coach of poly. The number of coats you apply will be up to you. With the triple thick poly I liked 2 coats with sanding in the middle. With normal poly formulas I liked 4 coats. The first coat of poly that touches stain will use more poly than the successive coats. Why? I think because it partly absorbs into the wood. When you have a smooth surface of poly, the second coat spreads more easily, too. So, the successive coats become a bit easier.
I will note that the back panel can sometimes get a little warped when poly coats dry. This is not a big deal but can look scary. During the assembly process, your finishing nails will help straighten it out. Here is an example of what I mean:
Do you see the curve? That happened on every back panel I made. They all straightened out no problem.
Step 12
Assemble the shelf. You might want to watch some videos on how to use corner clamps before attempting assembly. Assembly takes longer than you think, too. For me, I did not pre-drill any holes on any of the shelves. Probably, this would have been a good idea. But, in the end, I assembled them just fine.
This is the step where corner clamps are invaluable if you don’t have held.
Step 13
Before bringing the shelf into your home, I recommend putting it in direct sunlight on 0% chance of rain days for a week or so. When you do bring it in, there will still be some off-gassing smells. There is a lot of advice for this online. What I did was open the windows with a fan to suck the VOCs outside and a VOC rated air purifier.
WARNINGS
- If you use oil-based pre-stain, then use oil-based stain and polyurethane.
- If you use water-based pre-stain, use water-based stain and polyurethane.
- Mixing and matching brands is fine as long as you follow the rules in 1 or 2 in the list.
- Always work in the direction of the grain on every step.
- You can pre-drill holes for the assembly step – might make it easier than what I did.
