I am writing this more for myself than for you. I want to remember all the steps and procedures for building a patio. If it helps you, then great! A bit of background… we bought a new house and there was a pool in the backyard. We didn’t want to maintain a pool; so, we decided to get rid of it. Being an above ground pool, that meant there would be a bunch of sand under it; therefore, we decided to build a patio. So, for us, step 1 was getting rid of the pool during junk pick up.
The basic steps to making a patio are simple:
- Get your materials / tools in advance of your project
- Make sure it isn’t going to rain for 3 days in a row
- Properly prepare the land / base
- Keep drainage in mind when preparing the land
- Lay weed cloth
- Install edge restraints
- Put 0.75 – 1 inch of sand across the area
- Lay paving stones in a pattern
- Bind the pavers together with polymeric sand
I’m going to write about each step in painstaking detail because I want to remember everything I did. I have also been asked by a few friends who may want to do this in the future; so, perhaps they can benefit from my efforts.
Stuff to Know in Advance
Budget
If you are on a tight budget, you will want to source everything before beginning. I will provide a list to you with the prices I paid to help you. I am writing this post in August of 2019 and my project was done in July of 2019. Important Note: One really great thing about Home Depot and Lowes is they have buyback programs that give you a 100% refund on unused materials. If you have enough materials that they need to come pick it all up, you may need to pay a pick-up fee. Step 1 below outlines the pricing I encountered.
Paving Stones or “Pavers”
You will need to determine in advance what kind of pavers you want. If you don’t have a lot of experience, I’d recommend sticking with square and rectangle-style pavers. There are asymmetric pavers that could look neat; however, it is a little more difficult to calculate how many you need etc… We chose the “colonial mix” paving stone offered by Home Depot. Essentially, they look like a short brick and they are all a slightly different hue so our patio doesn’t look like a red brick wall.
Choose a Pattern
There are many different patterns but you’ll want to settle on one in advance. Some patterns can be done with all the same pavers while other patterns require pavers of different sizes. We chose the “basket weave” pattern because it seemed good for drainage and was simple. Here is a cool resource for helping you determine your pattern: https://www.belgardcommercial.com/resources/design_solutions/pattern_versatility
Consider Drainage
For a month or two before starting the project, I went outside whenever it would rain. I wanted to get a good feel for where water was pooling up, where it was draining, etc… You’ll want to determine which way the water flows and then prepare your land accordingly. More on that later.
3-Days with no Rain
There are 2 reasons you do not want to fight rain with this project. First, when you lay your sand, if rain gets on it, you will need to redo the sand most likely. Secondly, the polymeric sand you use to bind the pavers together as the last step is water activated. Rain can make it harden too soon and you cannot control the flow of the rain. If the rain drops are big, they can strike with enough force to displace the polymeric sand. Then, it will harden on top of your patio where it splashed and create ‘stains’ that won’t scrub out. Lastly, the polymeric sand takes 24 hours to harden in 50% humidity.
Plate Compactor & a Truck
You will also need to rent a few tools along the way. A plate compactor is extremely handy but very difficult to lift yourself. You’ll need a buddy for this part of the job. You will be able to push it on your own, but it is a big awkward machine that is difficult for most people to lift by themselves. You’ll also need a way to get it to your house and back to the store. My Jeep Patriot worked fine for this project.
3 Types of Failure
When creating a patio, you are fighting to prevent 3 kinds of failure: Vertical, Horizontal, and Rotational failure. Vertical failure occurs when you use too much sand. Essentially, if your patio chair comes down on a weak corner of a paver, the paver will up-end itself as the sand shifts underneath. Horizontal failure occurs when pavers fall off the edge of your project. Finally, Rotational failure occurs when the pavers move side-to-side weakening the jointing sand which can also cause further jointing sand cracks which also exposes the sand under the patio to rain. I will cover the solutions to these issues as we go.
Expectations & Budget Meeting
Because I am not a contractor and because I have never built a patio, Tracy and I had an expectations meeting. While that might sound super formal to some people, I just felt it was a good idea because if it turns out poorly, I wanted us to know that is a possibility. We also discussed our budget in advance which gave me the ability to source materials and look at stuff. In the end, our budget was $1,500, we spent $1,700, but when we returned materials in came in closer to $1,300.
If you are wondering where the $10,000 estimate came from, I found a job in Minnesota that cost about $14,000 and had a very similar amount of square feet. Contractors determine pricing based on square feet and materials. Anyway, it was also stated in the video that they are a little more pricey in Minnesota than other parts of the country. After looking up some costs, I came up with the $10,000 number.
Research before Buying
My research was done by going to Home Depot, Lowes, and Garden Centers several times. I took pictures of products and prices while in each store and sometimes asked questions. I actually found most people in these stores did not really know much about patio building. That is where YouTube came in. I watched about 10 hours of videos on how to do patios, how much they cost, all the materials needed, etc… The most important thing to do is to watch youtube videos for how to level land and how to prepare all your base layers that will be under your patio – that will determine your success.
Determine where you can Dig
Since we didn’t dig, because the hole was already made from the pool, we skipped this step. However, if you are unsure where you are allowed to dig, contact your local municipality and they will come out and mark the ground. This can impact your project but usually this stuff doesn’t run through back yards where most patios go.
So, here are all the steps, in order, with details and “How To” along the way:
Step 1 – Get your Materials / Tools Ready in Advance
Since you have a 3-day window with no rain, you will need all your materials present for the job before you start the job. Specifically, you will want your pavers and sand as close to the job site as possible.
A. Paver Stones – Variable Cost based on desired pavers
My pavers cost around $0.37 each. Due to a quantity discount, I got about 5 cents off per paver. But, the quantity discounts are usually done by the pallet and I ordered 2 pallets. There was also a delivery fee of $79 and, when I was finished I had many pavers left over. So, they came by for another $79 and picked them up. Then, I got a refund at the store the next day once they confirmed their receipt of the materials. This refund ultimately put me $200 under budget (so the title of this article could actually read $1,300 instead).
The number of paver stones you need will need to be calculated. I recommend estimating high since Home Depot will buy materials back later on. Plus, you will have some pavers arrive broken. Being too exact will cost you in the end.
B. Sand – $2.50 – 3.50 per bag
You will need to calculate how much sand you need. You will only want 0.75″ – 1″ of coverage of the whole job site area. Using more sand than that will risk Vertical Failure. More on that later. So, keep that in mind when calculating how much sand you need.
One thing to understand about sand is that the reason it is a good base layer for pavers is that it handles drainage well, it shifts if the ground shifts when it freezes and thaws, and is affordable. However, it is not the only option. We used it because we had a bunch of sand under the pool we removed.
Note that buying a dump truck full of sand is going to be a bit cheaper; however, because Home Depot / Lowes buys unused materials back, I recommend buying bags of sand. Otherwise, if you over order sand on a truck load, you now have to bag up the sand and get rid of it. That would be a lot of potentially unexpected work.
C. Bags of Top Soil – $1.55 per bag
Calculating the number of bags of top soil you’ll need depends on a few things. For me, I have a 21-foot diameter circle that was 6 inches deep in my back yard. Knowing I only will have 0.75″ – 1″ of sand and knowing the height of the pavers was about 2.5 inches, I needed about 3.5 inches of top soil so that the pavers would be level with the surrounding land. Your situation may be different, especially if you are excavating land.

Each bag of top soil, and this was true across brands, was 0.75 cubic feet. Knowing that made it clear I needed to buy 150 bags. We had enough sand left over that we were able to use some of that to save some money on this part of the purchase as well.
The same thing is true for dirt as sand… if you buy bags, you can sell it back to Home Depot. If you buy a big mound of dirt and you miscalculated, you now have a bunch of dirt that needs a new home.
D. One 2″x 4″ – Cost about $5
E. Two 5-foot 3/4″ PVC pipes – $2 for a 10-foot section
F. Weed Cloth – $12 – $15 for 100 feet
G. Weed Cloth Metal Stakes – $10 for about 50 or so
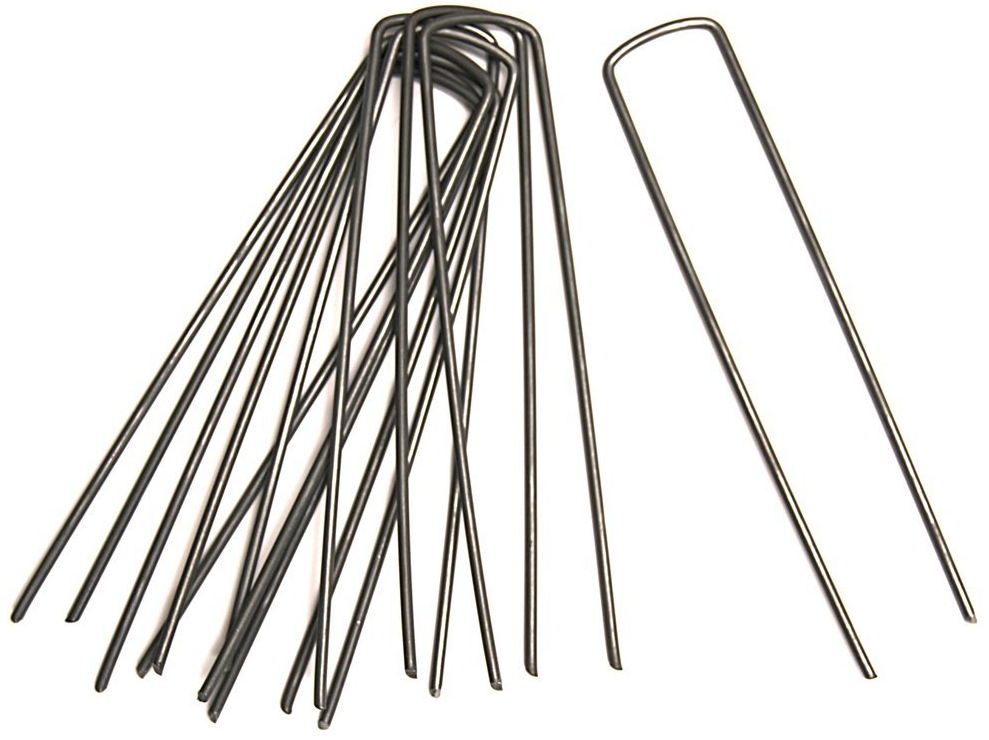
H. Edge Restraints – $10 per 6-foot restraint
If you are doing a non-square / non-rectangle shape, you will need “Flexible” edge restraints. These will bend to fit curves etc… The edge restraints I bought were ridged until you cut them at the binding points and then they become flexible. You can see a picture of them further down.
I. Polymeric Sand – $20 per bucket
It is pretty difficult to determine how much of this stuff you need. However, since Home Depot will buy stuff back from you, it is fine to over buy this stuff and return it.
J. Nylon Edge Restraint Spikes – $15 for 24
Edge restraints have holes for these spikes every few inches. You only need 1 spike for every 5 holes or so. I considered getting enough for every hole; however, the more holes you put in your bottom layers, the more fissures you create and you could potentially destabilize and area which may promote sand to shift under the pavers. So, an easy rule of thumb would be 6 spikes per 6-feet of edge restraint.
Tool Rentals
K. Roto-Tiller – $26 for 4 hours or $37 for 24 hours with a $25 deposit
I highly recommend this rental. Tilling by hand will take a long time.

L. Plate Compactor – $57 for 4 hours or $81 for 24 hours with a $150 deposit
I highly recommend this rental. Humans cannot level by hand as well as this machine levels.

Tools
M. Steel Rake – At a cost of around $25
N. Push Broom – $10 – $25
O. Hacksaw – $15 – $30
P. Rubber Mallet – $5 – $10
Q. String / Chalk String – Variable but probably $3 – $10
R. Level – $8 – $20
S. Trowel – $5 – $10
T. Leaf Blower – $50 or so (I borrowed one)
Optional Purchases
U. Chop Saw / Circular Saw – Variable Cost depending on brand and type
If you wish to have a non-square / non-rectangular shape for your patio, then you might need one of these types of saws. If you intend to just do a square or rectangle, you will likely not need either of these.
Note that if you do need to rent one, there are two main ways to cut pavers. I will cover this now because I have no need to cover it later. Basically, you either bring the pavers to the saw or the saw to the pavers. A chop saw is better if you are going to bring the pavers to the saw. Otherwise, you want a circular saw.
In order to mark on each paver the proper cut lines, take a piece of chalk, after the pavers are laid out, and draw it across the whole patio where the cuts need to be. Now, if you are using a circular saw, you cut along the chalk line where the pavers sit. Otherwise, you bring each paver to the chop saw. Note that you will need a “diamond blade” for this project.
V. Gravel – $5 – $6 per bag
During our expectations & budget meeting, this was one element where I determined we could save money and skip. Essentially, when you prepare your base layers, you need to consider drainage. If your yard has drainage issues, I do not recommend skipping this step. Gravel makes a very good base layer for pavers and for drainage. Since our yard didn’t have any drainage issues, we skipped this step. I’ll know in about 2-years if this was unwise or not. However, my research indicated many people skip this step and their patios are fine. It really seems to depend on drainage. Our patio was also relatively small at about 12 feet x 12 feet compared to a lot of the projects I saw when researching.
I will note that you can buy this in lieu of top soil or you can still buy both. I recommend researching more if you wish to go this route. Early on I discovered I didn’t need to so I don’t have as much advice on this part. I do know the plate compactor still works on the gravel, though!
W. Hand Tamper – $25.00
I found the hand tamper to be useful during various stages of this process to shore up little spots that didn’t get compacted enough around the edges. However, it would have been fine to do without.
After going through that list, you will understand your estimated budget and you can begin making purchases. You should also note that some of these purchases will turn into investments which can make future projects cheaper. However, most people have very little need for a hand tamper so, in hindsight, it would be better not to own one. But, I do!
Step 2 – Make sure it isn’t going to rain for 3-days
Once you have all your materials, begin checking the weather forecast. If you live in a particularly rainy area, this may be difficult. However, it is crucial. Humidity levels can also be important to check. The more humid it is, the longer it will take for your polymeric sand to harden near the end of the process.
Step 3 – Properly Prepare the Land
This is the most important part of the whole process. If you do not properly prepare your base layers, then you risk Vertical, Horizontal, and Rotational failure and/or drainage issues. So, the six parts of step 3 should not be skipped:
Part 1
First you need to determine the grade / decline of your land. The rule of thumb is you want the land to decline 1 inch every 4 feet. This is where your 2″ x 4″ comes in handy. Put the 2″ x 4″ on the ground with the 2″ side touching the ground. You can then use a level on top of it to determine the approximate decline. Note that you don’t actually want it to be perfectly level. You want the bubble to be a bit over the line. Your goal here is to dump more dirt where you need a steeper incline and less dirt near the ‘drop off’. Measure this grade in various places – I recommend 1-measurement every foot of the patio.
I also recommend using string / chalk string to help you determine your grade. Rather than describe this process, I recommend you watch videos on youtube about “How to build a paver patio.” There are various methods. The methods change slightly if your patio is stand alone, connected to a house, etc… Once you understand how the water will flow, move on to #2 below.
Part 2
Rent the roto-tiller and use it to till about 4 inches deep over the whole patio area plus an extra foot all around. When tilling, if you come across a fist sized rock that won’t move, till around the whole thing then you can remove it. If it is larger, you may need to excavate it manually. I also want to make note that the roto-tiller can make your hands feel pretty cramped. So, I recommend breaks. I didn’t take as many as I should have.
One thing to keep in mind about these tillers is whenever you encounter a rock under the soil, the angle you encounter it will cause the machine to act in different ways. For example, if you come straight down on top of a rock, the machine will bounce a little as it skips against the hard surface. However, if you meet the rock at the side, it can potentially launch the rock in a lateral direction.
I had both scenarios happen to me many times. The size of the rocks matters, too. Like coming down on top of a large rock will mean it won’t budge and your tiller will just bounce up and down. So, just be aware these things can happen. While I wouldn’t want someone off to the side watching me till, I never felt either scenario put me or anyone in danger. The “launching rocks” may be a bit of a strong image as they didn’t go more than a few feet.
Part 3
Once everything is tilled, return the tiller to the store and go get lunch.
Part 4
Now, open bags of top soil (or gravel if you went with that) in the areas you determined in part #1 above. Put more bags of dirt where you need the land to be higher and less where you need it to be lower. Spread the dirt around with the steel rake. I recommend using the teeth-side of the rake for spreading mounds and the bar-side of the rake for leveling. Once you have it how you want it, go on to part #5.
Part 5
Once all the dirt is spread around, you can be done for the first day. If you have an additional 4 hours, then you can move on to the next step. You don’t really want to do the next step half-way so I recommend making sure you have enough time or just do it the next day.
Part 6
Go rent the plate compactor. There are other forms of compactors. The most fun looking one is the Jumping Jack compactor. I am not certain I could have man-handled this thing around. It does the best job of compacting but it can be difficult to use. Most people will be able to use a plate compactor. I watched a youtube video (the link is provided on the top line of part 6 above) that compared a plate compactor, jumping jack, and a hand-tamper. If you have to pick one, the plate compactor is best. If you want to the tip top best job possible, get the jumping jack first then the plate compactor second.
The key to using the plate compactor is making the ground damp. You don’t want to see puddles of water but you also don’t want to see the plate compactor shooting dust into the air. Also, let the plate compactor operate and don’t push it too much. You will have to push it when it is on a slight incline though. It is slow moving but this is a fun and easy part of the job.
If it is a hot day, you may need to re-dampen the ground. As you compact, there will be mounds of dirt that make little hills in an otherwise level area. Use the steel rake to rake these flat and spread the dirt in a logical direction based on your drainage assessment. Repeat until the area is as smooth as you can make it. The rule of thumb is you don’t want more than 0.5″ variance between different locations of the dirt. You can measure this with a tape measure, ruler, string, laser measurement devices, etc… You can also get your 2″ x 4″ back out and set your string back up to see how well the compactor did. After this step, there is no going back in terms of leveling the land without going through great pains.
Finally, during this step, you will need another person to help you lift this in and out of the truck. Yes, you will need a truck or an SUV. This device, while helpful, is pretty unwieldy and very heavy. Someone who is very tall and strong could do this part on their own. But, I am neither of those things so I needed help from a friend.
Once you return your plate compactor, this concludes that part of the land preparation phase.
Step 4 – Lay Weed Cloth
I recommend overlapping the weed cloth a little bit. They generally come in 4 feet wide 100 foot long rolls. So, most jobs likely only need one or two rolls. Affix the weed cloth to the ground with metal weed cloth stakes. Be sure to get your edges done and secure the overlap parts of the weed cloth.
Step 5 – Install Edge Restraints
Depending on your pattern and project, this next step either happens now or later. If your patio is stand alone and not butted up against a house, you need to do this step now. If your patio is butted up against a house or other structure, you may do this later.
Because my project was not against a structure, I installed the edge restraints now. This gave me a wall to contain the sand. However, I did not immediately hammer in the nylon nails. First, I laid out, on our newly flattened land with weed cloth, the number of pavers that composed the outside square in a basket weave pattern. I felt this was much easier to do than measuring everything out and hoping I got that right.
With the pavers loosely in place, I installed the edge restraints around the perimeter of the pavers. I then secured them into the ground at a rate of 6 nylon spikes per 6-foot edge restraint. Once they were secure, I removed all the pavers that served as a guide for this step.

Cut the bar between the spaces if you need it to become flexible for curves.
If you are butting your patio up against your house or another structure, you can begin the next step before laying your edge restraints. If you pre-lay your restraints without measuring perfectly, you may end up having to redo your edge restraints. So, the idea is build from the structure to wherever you need to and then lay restraints after you do the next step.
In hindsight, I should have, for my basic square patio, installed only 3 sides of the edge restraints. Leaving one side open would have meant I don’t need to be so perfect about the measurements. In the end, it worked out; however, if it didn’t, I’d have had to uproot the edge restraint, risking tearing the weed cloth, and then reinstalling it (ie: making new holes in the flat ground I leveled).
There is also a type of edge restraint, which I did not do, that has an additional lip that inserts under laid-pavers and the sand they are on. The pavers I used do not have this addition and therefore laying them in advance was just fine.
Finally, if your project requires you to cut edge restraints, now is the time. Get out the hacksaw and mark your cuts gently with the hacksaw onto the edge restraint. Then, when you have your cuts, saw away – it is pretty easy. It helps to have a person, or stack of pavers, to hold down the edge restraint while you’re cutting it.
Step 6 – Pouring Sand, Leveling Sand, and Laying Pavers
Now comes the sand! Begin spreading your sand out all over the area just so you cannot see the weed cloth. Once you have a bit of coverage, get your PVC pipes and lay them about 3 to 5 feet apart and pour sand between them. What you will do is put the 2″ x 4″ on top of the 0.75″ pipes with sand in between the pipes. As you pull the 2″ x 4″ toward yourself, it smooths out the sand perfectly.
I recommend pulling the 2″ x 4″ about 2 feet toward yourself. Once that occurs, leave it in place. Its weight will help stabilize your PVC pipes. Then, put your hose on the mist setting and very lightly spray the sand. When the sand darkens, you have enough water.
Next, gently lay the pavers onto the sand in your pre-planned pattern. While it can become a little tedious, be sure your fingers are not below the bottom of the paver. Otherwise, when you lay it down, your fingers will depress the sand and you’ll create a potential point of failure in the sand. If you do mess this up, no worries, you can generally smooth it back over with the trowel.
You may notice, at least on brick-style pavers, that each paver has some little spacer-bumps on all sides of the paver. This is so that when you place the pavers side by side, they will not only be pushed apart a little to receive the polymeric sand (on the next step) but also because it helps them stay equidistant from one another.
If you notice pavers begin to not align perfectly, you can use the rubber mallet to gently bump them back into place. Picking up the pavers can put a dent in the smooth sand surface. So, use this method and do it gently if needed.
As you lift the PVC pipes out of the sand, they will create small trenches. No problem. Use your trowel to gently fill in and smooth over these little trenches. This is also why I recommend only pulling the 2″ x 4″ back 2 feet or so at a time. That way you can always reach the entire ‘trench’ to fill it in. During this process, if necessary, you can walk onto the pavers you have laid out. I recommend walking with a flat foot stance and try not to step on corners with all your weight.
I recommend watching some youtube videos on this process so you can get an idea. It is harder than the videos make it seem. The key is to have too much sand up front and as you pull back toward yourself, the sand fills in. I am not going to recommend a specific video here because I learned things from watching about 10 – 15 different videos. I recommend you do the same.
Step 7 – Polymeric Sand
The next step is to pour the polymeric sand into the center of the patio. Then, use a push broom, or a normal size broom if you didn’t want to spend the money on a push broom, to sweep the sand between the cracks. Walk around lightly stomping your feet when doing this to shake the sand down further. Then, push more sand in.

One neat thing about the brick-style pavers is that the edges and corners of each paver are slightly angled. The reason becomes apparent when sweeping in the paving sand. Essentially, when two paves are side-by-side, the angled parts line up. When the sand fills the crack, you get a nice thick paver sand (polymeric sand) border between the bricks. It will also be an even width throughout.

Once the sand is all throughout, use a leaf blower at waist level to blow excess off. That waist level idea is pretty important. Otherwise, you’ll send wind between the pavers and your polymeric sand, and sand base layer, will blow away. I also recommend using a low setting.
Before the final step, you can re-rent a plate compactor and run it over top of the pavers. Yes, some will break and then you replace those. This is a recommended step by a lot of people online. I chose not to do it.
After that is done, you need to set your hose on low power and on the “shower” setting. In a back and forth motion at waist level, begin spraying down the patio. The polymeric sand will drink up the water and you’ll see the sand get darker. After a few minutes, do it again. You stop when you see a little bit of excess water that is no longer being absorbed. Do not walk on the patio for 24-hours. I didn’t walk on mine for 3 days because we have higher humidity here in Louisville, KY.
Step 8 – Clean Up
For us, clean up actually involved dumping more bags of dirt on the outside of the patio to bring the land up to the level of the patio. However, your project might allow you to dump these bags sooner.
Recovering from Mistakes
Along the way, there were a few mistakes I made that you might repeat. So, here are some ways to handle those situations.
1. When laying pavers, it is best to have just one person lay pavers while another person brings pavers. You can switch off jobs but keep it like this. For larger jobs, have a 1:1 ratio of paver layers to paver bringers.
2. Use elastic cords to secure the rototiller if you are transporting it alone. If it falls over, you’re going to have gas / oil in your car. This did not happen to me, but it could have if I didn’t think of this in advance.
3. If 2 pavers are stuck together – don’t ask me how or why that happens – they can refuse to separate. Find both halves of a broken paver, set it on the ground, and from a height of about 4 inches, drop the two stuck pavers onto the broken paver. This will separate them. I hurt myself when trying to pull them apart with my hands – don’t do that.
4. If you get carried away and smooth out too much sand before laying pavers, you get to a point where you may not be able to reach some areas. That would mean you’d have to re-smooth out the sand you’re about to go walk on. So, keep that in mind – smooth some sand, lay some pavers, repeat.
5. The PVC pipes can move unexpectedly in your downward & backward force is too great when smoothing out sand. This will cause you to have to backtrack annoyingly. So, I put pavers / sand on the back end of the PVC pipes to weigh them down a bit. Once the PVC pipes hit the edge restraints I installed (because I installed them before laying sand) they remained until I removed them.
6. Sunscreen. That is all I need to say about that.
7. If you are having trouble pushing the plate compactor uphill and it is compacting downward too much, just change directions and go at it from a different angle. You can use the steel rake to smooth it out and fix that spot if it caused an issue.
8. Buy the insurance on any rented equipment. Thankfully, I did. The plate compactor actually died on me when I was about 95% finished. Home Depot gave me 10% off and offered to let me use another compactor for 4 hours when this occurred. Had I not gotten the insurance, I would be looking at a $1,200 purchase.
I think that is everything I can remember that I did. I hope this helps.
